
As seen in









Formaticum Cheese Blog
Wire Cheese Cutter Vs Traditional Knife: Choosing the Right Tool for Your Cheese
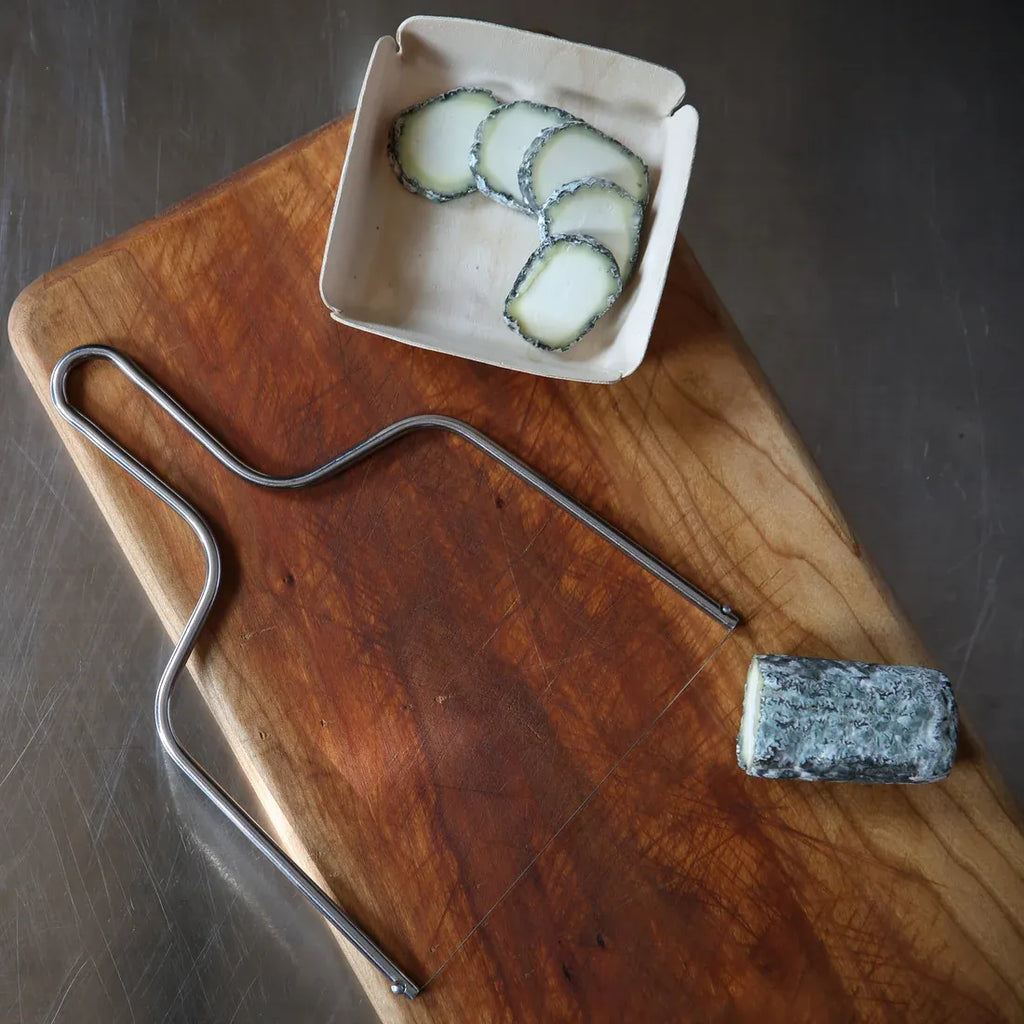
A Wire Cheese Cutter and a traditional cheese knife are both legitimate tools. They just do different things, and which one serves you better depends on the cheese in front of you. Wire cutters excel at clean, even slices through fresh, soft and semi-soft cheeses. Knives handle rind work, portioning, and harder cheeses that a wire would struggle with.
Understanding the difference means less mess, less waste, and better results on the board. Here is how they compare.
What Is a Wire Cheese Cutter?
A wire cheese cutter, also called a cheese wire or wire slicer, uses a taut length of thin metal wire in place of a blade. Instead of dragging a knife edge through the paste, you draw the wire downward with steady pressure. The wire has almost no surface area, so it creates very little drag and does not compress or smear the cheese as it cuts.
Most handheld wire cutters consist of a handle and an arched wire held under tension. The wire does the work; your hand guides the angle and pressure.
Formaticum's Wire Cutter uses a stainless steel wire and a food-safe stainless steel handle, available in 5" and 9" sizes to suit different portions and wheel sizes.
When to Use a Wire Cutter Instead of a Cheese Knife
Wire cutters earn their place when clean, even slices matter more than detailed trimming or precise rind work. They are not a universal replacement for a knife. Each tool has situations where it genuinely outperforms the other.
As cheesemonger Donald of The Cheese Professor puts it, "I'm a knife guy, but cheese wires make a lot of sense. There's a lot of friction and sticking when you cut cheese, so a tool with as little surface area as possible makes a big difference."
And according to USDA data reported by the International Dairy Foods Association, Americans consumed 41.9 pounds of cheese per person in 2024, up 13 percent over the past decade. More cheese on more boards means the right tools matter more than ever.
| Scenario | Best Tool | Why |
| Even slices from a soft wheel | Wire cutter | Minimal drag, no compression, clean face |
| Portioning a semi-soft block | Cheese knife | More control for even pieces |
| Trimming or shaping a rind | Cheese knife | Precise blade control around edges |
| Breaking hard-aged cheese | Hard cheese knife or chisel | Wire risks snapping on dense, dry paste. |
| Spreading soft cheese | Spreader knife | Wire cannot spread, only slice. |
Types of Wire Cheese Cutters
The cheese-cutting guide starts with determining which style of wire cutter you need. Consumer tools fall into three practical categories.
| Type | Description | Best For |
| Handheld wire cutters | Single handle with tautwire, like Formaticum's Wire Cutter | Portioning soft wheels at the table or counter |
| Board-style slicers | Wire mounted over a flat cutting surface | Consistent slicing at volume, popular in home kitchens |
| Professional cheese wires (Handee Cutter) | Large board base with floating wire, used behind cheese counters | High-volume portioning of full wheels in retail settings |
Retail terminology varies. "Cheese wire," "wire slicer," and "wire cheese cutter" all refer to the same tool category. The format differs; the principle remains the same.
Cheeses That Work Best with a Wire Cutter
Soft, semi-soft, and some semi-firm cheeses respond best to wire cutting. Very hard or very crumbly cheeses are better served with a knife.
| Cheese Category | Handheld Wire Cutter? | Notes |
| Soft (Brie, Camembert, chèvre) | Yes | Wire glides cleanly without tearing the paste. |
| Semi-soft (young Gouda, Taleggio, Havarti) | Yes | Even slices with no compression or smearing. |
| Semi-firm (young Cheddar, Gruyère) | No, but the Handee cutter is advisable | Works well when the cheese is at room temperature. |
| Hard aged (Parmigiano-Reggiano, aged Manchego) | No | A dense, dry paste risks snapping the wire. |
| Crumbly (Stilton, Roquefort, feta) | Yes | The wire glides through the delicate paste without disturbing it. |
How to Use a Handheld Wire Cheese Cutter
Tempering the cheese and positioning it correctly before you cut makes the difference between a clean slice and a smeared one. Slice thickness depends on the tool size, cheese texture, and what you are serving.
Prepare the Cheese
Pull soft and semi-soft cheeses from the refrigerator 20 to 30 minutes before cutting. Cold cheese compresses under pressure rather than yielding cleanly. A tempered young Gouda or a room-temperature chèvre log will slice in one smooth pass.
Position the Wire
Hold the cheese in your non-dominant hand and the Wire Cutter in your dominant hand like a pencil. Align the front of the wire with the front of the cheese, farthest away, and make sure the rest of the wire is lined up with the cut you want to make. For a serving board example, align the wire across a chèvre log to portion even rounds for guests, or across a Brie wheel to cut clean wedges without crushing the rind.
Cut with Steady Pressure
Press the wire downward in a single, even motion, focusing on the front of the wire first so the rest follows. Do not saw back and forth. Consistent pressure produces a clean, smooth face. Uneven pressure creates a dragged, irregular cut that wastes cheese and affects presentation.
Features to Look for When Choosing a Wire Cheese Cutter
Focus on the practical quality signals that affect how the tool actually performs in use.
| Feature | What to Look For |
| Wire tension | Taut wire cuts cleanly; a slack wire drags and compresses. |
| Handle comfort | Enough grip to maintain steady downward pressure without strain. |
| Wire material | Stainless steel is the standard for corrosion resistance and food safety. |
| Size options | Match the wire length to the cheeses you buy most often. |
| Replaceable wire | Essential for long-term value; wires eventually stretch or snap. |
Formaticum's Wire Cutters use replaceable wires. To swap one out, squeeze the two sides of the cutter together to release the existing wire, then place the balls on the ends of the new wire into the slots on either side.
Release the sides to tighten and set the wire in place. Replacement wires are available separately in both 5" and 9" sizes.
Wire Cheese Cutter Mistakes to Avoid
Most problems with wire cutters come down to using the wrong tool on the wrong cheese or skipping basic maintenance.
- Forcing the wire through hard cheese. Aged Parmigiano-Reggiano, dry Manchego, or any dense, hard cheese provides enough resistance to snap the wire. Use a proper hard cheese knife instead.
- Applying uneven pressure. Tilting the handle mid-cut produces angled, uneven slices. Keep your wrist steady and draw straight down in a single pass.
- Skipping the temper step. Cold cheese resists the wire. A few minutes at room temperature makes a meaningful difference in slice quality.
- Not drying the wire after washing. Rinse the wire cutter after use and dry it thoroughly. Water left sitting on any metal component shortens its working life.
- Ignoring wire wear. A stretched or kinked wire produces ragged cuts. Replace it before it becomes a problem. Formaticum replacement wires are inexpensive and take seconds to fit.
How to Store Cheese After Cutting
Every cut exposes more surface area, which means the cheese starts losing moisture and picking up off-flavors faster the moment you slice it. Rewrapping promptly is not optional if you want the remainder to taste the way it should.
- Rewrap promptly. Cut what you need and rewrap the rest immediately. Allow airflow. Cheese is a living product. It needs to breathe. Wrapping cut cheese in breathable cheese storage paper wicks excess moisture away from the surface while allowing oxygen exchange, replicating the conditions of a cave rather than a sealed container.
- Avoid plastic wrap. Plastic is non-porous. It traps moisture against the cut surface, encourages surface mold, and builds ammonia in soft cheeses. The difference between plastic and proper cheese paper is the difference between vibrant cheese and dead cheese.
Final Thoughts: Wire Cheese Cutter vs. Traditional Knife
Neither tool wins outright. A Wire Cutter gives you cleaner slices through fresh, soft and semi-soft cheeses with less mess and less compression than a knife. A traditional knife handles hard cheeses, rind work, and situations requiring precise control.
The best-equipped toolkit has both. A small cheese knife set paired with a Wire Cutter covers virtually every cheese you are likely to serve.
Frequently Asked Questions
How do I clean a wire cheese cutter?
Rinse the wire cutter with warm water after use and dry it thoroughly before storing. Do not leave water sitting on the wire or handle. The stainless steel components resist corrosion, but drying after washing keeps everything in good condition longer.
Can you replace the wire on a cheese cutter?
Yes. On Formaticum's Wire Cutter, squeeze the two sides together to release the old wire, fit the new wire's end balls into the slots on each side, and release to tension it. Replacement wires are sold separately in 5" and 9" sizes.
What cheese is best for a wire cheese cutter?
Soft and semi-soft cheeses respond best: Brie, Camembert, young Gouda, Taleggio, chèvre, and Havarti all cut cleanly with a wire. Avoid using a wire on hard-aged cheeses, but it is usually very effective forvery crumbly blue varieties like Roquefort or Stilton.
Is a wire cheese cutter better than a cheese knife?
For soft and semi-soft cheeses, a wire cutter typically produces cleaner slices with less compression and mess. For hard cheeses, rind trimming, and precise portioning, a knife is the better tool. Most serious home cooks and all professional cheesemongers keep both.
5 Best Knives for Cutting Different Types of Cheese
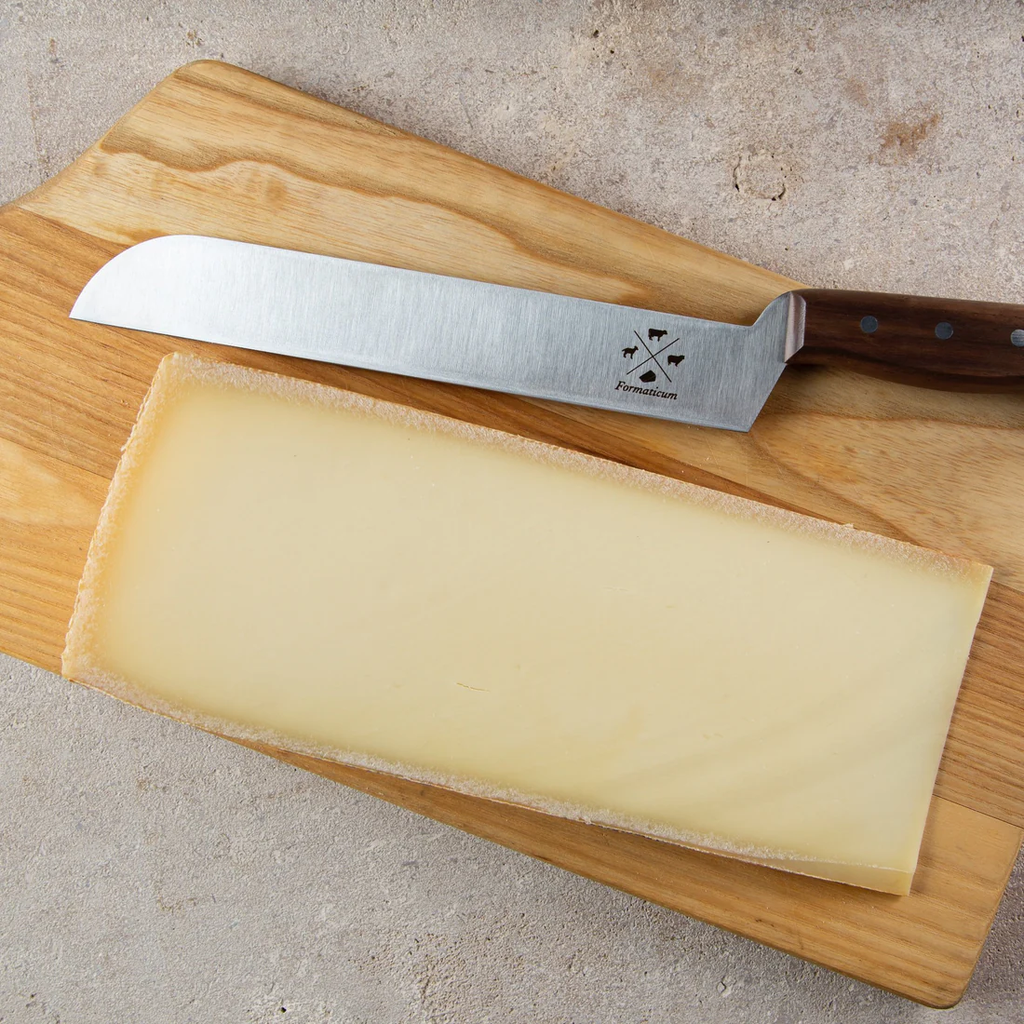
Wrong knife, ruined cheese. Drag a chef's knife through a soft wheel of Brie and you'll understand why in about three seconds. Every cheese type behaves differently under a blade. Soft varieties cling and smear, firm ones crumble under the wrong motion, and blue cheeses fall apart the moment a thick blade passes through. Knowing which knife to reach for is the difference between a clean, confident cut and a crumbled mess.
Here's exactly what belongs in your cheese knife set and why each one earns its place.
1. Professional Soft Cheese Knife
Soft cheese is notoriously difficult to cut cleanly, especially at room temperature. The texture clings to everything, and a standard blade turns Brie or Camembert into a smeared disappointment within seconds.
The soft cheese knife solves this with a hollow or perforated blade. Those holes reduce surface contact so the cheese releases cleanly instead of dragging. Small design detail, big result.
Use it for Brie, Camembert, triple crèmes, and any soft-ripened variety. Room-temperature cheeses are the trickiest. They're at their most adhesive right when you want to serve them.
Having the right blade means you don't have to rush or refrigerate just to get a clean cut. If you're starting to build a collection, small cheese knives like this one are exactly where to begin.
2. Professional Serving Cheese Knife
The Professional Serving Cheese Knife does two jobs in one pass. It cuts and serves. Once you've made your slice, the forklet at the tip lets you lift and transfer it directly to the plate without touching the cheese.
That matters more than it sounds. The oils from your fingers affect both surface quality and flavor, and on a board where presentation counts, fingerprints and smearing show. The forklet removes that problem entirely.
Handmade in Italy with a stainless steel blade and solid walnut handle, this knife works across all cheese types, making it one of the most practical single tools in any cutting setup.
3. Professional Blue Cheese Knife
Blue cheeses like Gorgonzola, Roquefort, and Stilton are soft, crumbly, and notorious for sticking to any blade with real surface area.
The Professional Blue Cheese Knife is built for exactly this. Its blade measures just 0.25 inches wide, so there's minimal contact as it passes through. Less contact means less sticking, less tearing, and no clumping on the blade. It's the difference between a clean slice and a wedge that falls apart before it reaches the board.
Use it any time you're working with blue-veined varieties. A standard blade will drag through the body and destroy the texture entirely. Handmade in Italy with a stainless steel blade and solid walnut handle, it's built to the same standard as the rest of the knife range.
4. Professional Cheese Knife
The Professional Cheese Knife is the go-to blade for firm and hard cheeses. Its wide, sturdy blade with a flat edge is designed for applying even downward pressure which is exactly what aged Cheddar, Gruyère, and similar varieties need.
A rocking or dragging motion causes crumbling. A clean press straight down gives you uniform pieces every time. The offset walnut handle keeps your knuckles clear of the board and gives you full control over each cut.
This is also the knife worth using on anything aged. Manchego, Comté, or a well-matured Gouda all respond the same way. Firm texture, even pressure, consistent result. If there's one knife most home setups are missing, it's this one.
5. Professional Soft Cheese Knife w/ Forklet
This is the upgraded version of knife #1, designed for anyone who wants the full cut-to-serve workflow in a single tool.
The Professional Soft Cheese Knife w/ Forklet uses the same void blade to cut through Brie, Camembert, and other soft-ripened varieties without sticking. But the addition of the forklet means you can lift and transfer each slice immediately after cutting. No fingers, no separate tool, no flavor transfer.
Think of knife #1 as your everyday soft cheese cutter. This one is for when the board is going out to guests and presentation matters as much as the cut. Handmade in Italy with a stainless steel blade and solid walnut handle, it brings the same build quality as the rest of the knife range. Cut, lift, serve and done.
Other Cheese Tools Every Cheesemonger Needs
A solid knife collection handles most situations. But certain cheeses and prep tasks call for something more specific. These tools round out a genuinely complete setup.
Wire Cutter
For ultra-soft cheeses and fresh logs of chèvre, a cheese wire delivers the cleanest cut possible. No drag, no compression. The wire passes through without resistance and leaves a smooth surface behind. Something no blade can match with the most delicate soft varieties.
Handee Cheese Cutter
The Handee Cheese Cutter is a countertop wire cutter built for volume and precision. A patented floating stainless steel wire (60cm) slices smoothly through all cheese types with no crumbling or waste, then springs back to position, ready for the next cut.
The food-grade polycarbonate base resists chemical action from cheeses, wipes clean with a damp cloth, and replacement wires fit in seconds. For anyone cutting cheese regularly, it's the tool that makes every other method feel inefficient.
Cheese Storage Paper
The cut is only half the job. Once you've sliced and served, the remaining cheese needs to be wrapped correctly, or it deteriorates fast. Formaticum cheese storage paper is designed specifically for this. It lets the cheese breathe while maintaining the right moisture level, preserving the flavor and texture the cheesemaker intended. Plastic wrap suffocates cheese. The right paper keeps it alive.
Tips for Choosing the Right Cheese Knife
You don't need every knife at once. Here's how to build a practical kit without overcomplicating it:
- Start with three: a soft cheese knife, the blue cheese knife, and a hard cheese knife handle the majority of everyday situations.
- Invest in quality: cheap blades flex unevenly and damage texture. A well-made set lasts years with basic care.
- Clean between cuts: switching between varieties with a dirty blade transfers flavors and can introduce contamination where it doesn't belong.
- Pair knives with proper storage: after cutting, wrap each piece in proper cheese-storage paper. The knife gets the cut right; the wrap keeps it fresh.
Conclusion
The right knife isn't a luxury. It's respect for the cheese. Soft varieties need perforated blades. Hard ones need even pressure. Blue cheeses need thin, minimal-contact edges that won't tear the body apart. Match the tool to the texture, keep your blades clean, and every board you put together will look and taste exactly the way it's supposed to.
Frequently Asked Questions
Here are the most common questions about cheese knives, answered directly.
What knife is best for cutting soft cheese?
A soft cheese knife with holes or perforations in the blade is the right choice. The reduced surface contact stops the cheese from sticking and dragging, giving you a clean cut through Brie, Camembert, and other soft-ripened varieties without tearing the surface.
Why do cheese knives have holes in the blade?
The holes reduce the surface area in contact with the cheese. Less contact means less sticking, especially with soft cheeses like fresh goat cheese that cling to solid blades and smear instead of slicing cleanly. It's a functional design feature built around how soft cheese actually behaves.
What tool is best for slicing cheese thinly?
For ultra-soft varieties and fresh logs of chèvre, a cheese wire produces the cleanest results. No compression, no drag. Just a smooth pass through even the most delicate cheese.
Can a regular kitchen knife be used to cut cheese?
Technically yes, but it causes real problems in practice. A chef's knife drags through soft cheeses, crumbles hard varieties, and destroys the texture of aged cheese that needs even pressure rather than a slicing motion. The right knife makes a measurable difference in both presentation and the eating experience.
10 Cheese Storage Tips to Keep It Fresh Longer
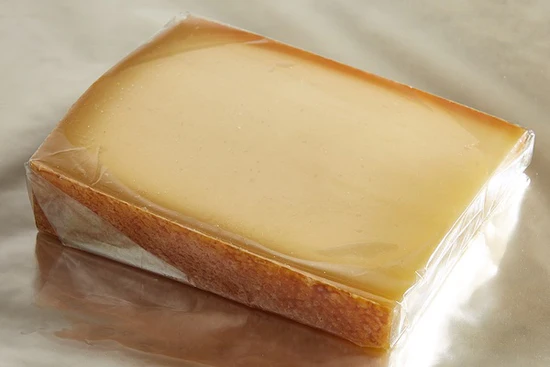
You paid good money for that wedge of cheese. Don't let it go to waste because of one bad habit. Most people reach for plastic wrap and wonder why their cheese tastes off by day three or find it dried out and cracked before they've had a chance to finish it. It doesn't have to go that way. These cheese storage tips will change how you handle every variety in your fridge.
1. Wrap Cheese in Breathable Material (Not Plastic Wrap)
Plastic wrap suffocates your cheese. Every time you seal it in cling wrap, you're blocking airflow, trapping moisture, and creating the exact conditions that breed off-flavors and mold. Cheese needs to breathe so swap it for professional quality cheese storage paper. That one change makes a noticeable difference almost immediately.
2. Store Cheese in the Vegetable Drawer for Stable Humidity
The top shelf of your fridge isn't the right spot. Every time the door opens, the temperature shifts and that constant fluctuation quietly damages texture and mutes flavor. The crisper drawer gives you something the top shelf can't: stable humidity and consistent cold. Think of it as a mini cheese cave. That's what cheese actually needs.
3. Keep Cheese Away from Strong-Smelling Foods
Cheese absorbs surrounding aromas. That's not a flaw. It's just how it works. Store it next to last night's leftovers or a halved onion and you'll taste those aromas in every bite. Keep cheese separated in the fridge and wrap each piece individually.
This matters even more when you're storing multiple varieties at once, since cross-contamination between types happens faster than most people expect. A simple dedicated shelf or drawer makes the habit easy to keep.
4. Use Cheese Paper for Best Results
If tip #1 is the rule, this is the upgrade. Formaticum cheese bags are a practical everyday option, offering breathable protection in a format that keeps your fridge organized without any extra effort. Unlike plastic wrap, cheese-specific storage lets moisture regulate naturally, so you get the right balance of airflow and humidity without having to think about it.
5. Maintain the Right Temperature (Around 1–4°C)
According to the USDA Food Safety and Inspection Service, the ideal storage range for dairy is between 35°F and 45°F (1.6°C to 7.2°C). Drop below that and your cheese loses depth. Go above it and bacterial growth accelerates.
That window exists for a reason. Staying inside it is what keeps quality cheese tasting like itself. If your fridge runs warm, use a thermometer to check the actual temperature rather than assuming the dial setting is accurate.
6. Rewrap Cheese After Every Use
Every cut exposes a fresh surface to air and mold spores. Rewrapping immediately after each use is one of the simplest habits you can build, and it extends shelf life more than most people expect. It doesn't take long. Fold the paper, press out the air and be done. Don't leave a sliced wedge sitting open on a shelf. Wrap it every single time.
7. Store Different Cheeses Separately
Hard cheeses like Cheddar and Parmigiano Reggiano behaves completely differently from soft varieties like Brie or fresh Mozzarella.
Storing them together causes moisture transfer and flavor bleed that doesn't belong in either. Wrap each type individually, and use a dedicated wire cheese cutter per variety if you're cutting regularly. Separation isn't overthinking it. It's just good practice.
8. Control Moisture to Prevent Drying Out
Too much moisture invites mold. Too little destroys texture. The goal is balance, and your wrapping method is how you get there. For semi-hard and hard cheeses, cheese paper is the right call.
For soft cheeses, cheese paper alone usually does the job. No extra container needed. The one thing to avoid across the board: sealing breathable wrapping inside a fully airtight container. That traps humidity and accelerates exactly the kind of mold growth you're trying to prevent.
9. Label Cheese with the Purchase or Open Date
Once you remove the original packaging, the best-by date is gone. Writing the date directly on your cheese paper takes a few seconds and saves you from guessing a week later. A Formaticum Cheese Label makes this even easier. You can note the purchase date, milk type, and country of origin all in one place. Small detail, genuinely useful.
10. Bring Cheese to Room Temperature Before Serving
Cold cheese is quiet cheese. Letting it sit out for 30 to 60 minutes before serving opens up flavor and aroma in ways that refrigerator-cold never will. Timing matters here, though:
- Soft cheeses shouldn't sit out longer than two hours
- Hard cheeses can handle up to four before bacterial growth becomes a real concern
Only put out what you'll eat in one sitting. If there's any left, scrape the cut face with a knife to remove surface butterfat before rewrapping and returning it to the fridge.
Common Cheese Storage Mistakes to Avoid
These come up more often than you'd think. Worth running through quickly.
- Reaching for a plastic bag: A zip-lock or any other plastic bag traps moisture, cuts off airflow, and speeds up mold growth. Both damage texture faster than expected.
- Skipping the rewrap: Leaving sliced cheese exposed, even briefly, dries out the cut surface and opens the door to contamination.
- Storing near strong-smelling foods: Cheese picks up neighboring aromas. Keeping it separated isn't optional.
- Freezing: Freezing changes texture, leaving most cheeses crumbly and grainy after thawing. It's best avoided entirely.
- Ignoring mold: On hard cheeses, cut at least ¼ inch around any visible mold and the rest is salvageable. On soft cheeses and cream cheese, visible mold means the whole piece goes in the trash.
Conclusion
The difference between cheese that lasts and cheese that doesn't comes down to three things: breathable wrapping, the right temperature, and a consistent rewrap habit. Ditch the plastic wrap. Move your cheese to the crisper drawer. Start fresh every time you cut. Your cheese deserves to be stored properly and now you know exactly how.
Frequently Asked Questions
Let’s address some common questions about cheese storage.
Can I freeze cheese for long-term storage?
No. Freezing leaves most varieties crumbly and grainy once thawed. The texture won't recover, and the flavor takes a hit too. It's better to buy less and eat it fresh.
How long does cheese last in the fridge?
It depends on the variety, the storage method, and the environment. The best approach is to buy less cheese, more often, and eat it as quickly as possible after purchase. That way you're always getting the freshest flavor and texture rather than stretching a piece past its prime.
Where should cheese be stored in the fridge?
The crisper or cheese drawer is the best option. It provides stable humidity and consistent cold without the temperature swings that come from the top shelf or fridge door.
How do I know if cheese has gone bad?
Look for unexpected mold, a slimy texture, or a sharp ammonia smell. On hard cheeses, surface mold can be trimmed by cutting at least ¼ inch around it. On soft cheeses and cream cheese, visible mold means discard the whole piece. Your senses are the best tool here. If it looks, smells, and tastes off, toss it.
What is the best wrapping for cheese storage?
Cheese-specific paper is the best option. It allows airflow while retaining the right level of moisture. Reusable cheese storage options are a practical, eco-friendly choice that keeps cheese in peak condition every time.
Best Cheese Knife Sets for Every Type of Cheese (2026 Guide)
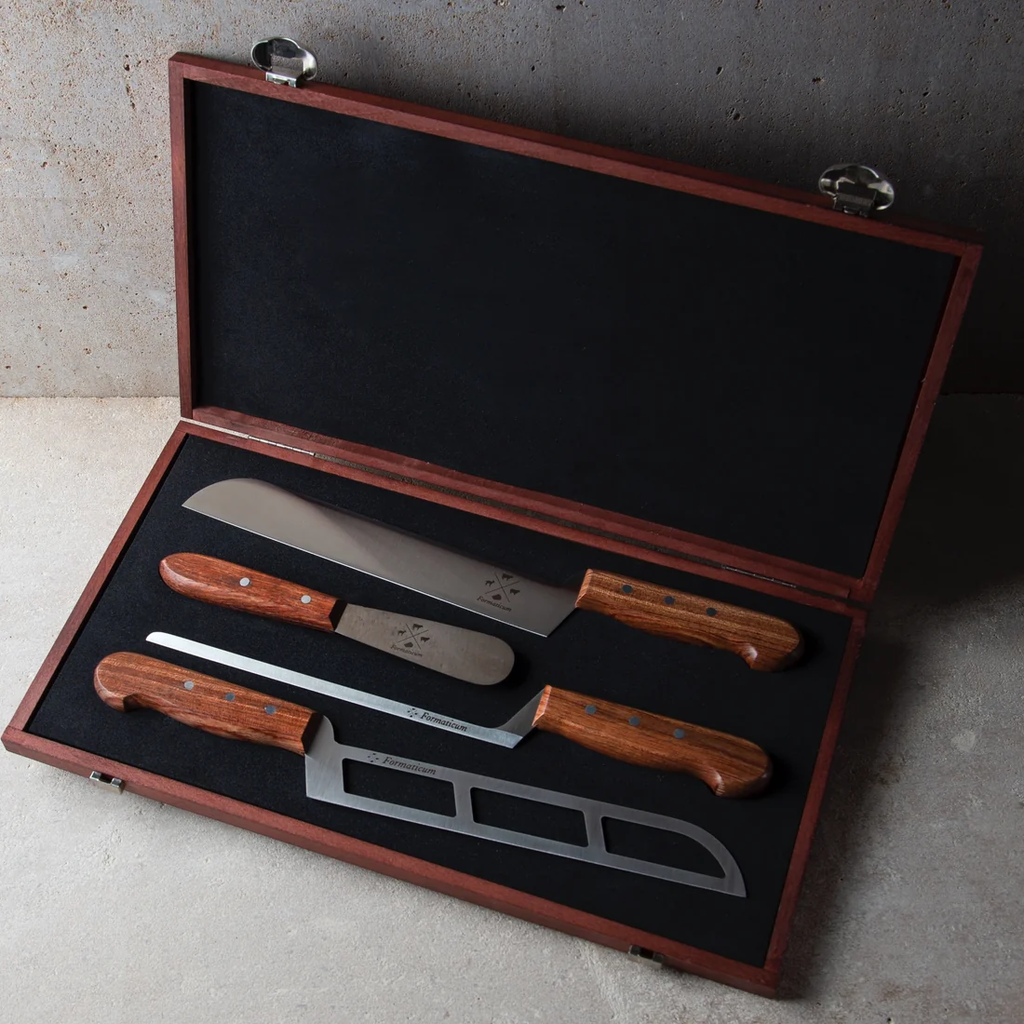
Nobody wants to wrestle with their cheese board. You've picked good cheese, arranged it nicely, and then, using the wrong knife, a wedge of Brie turns into a smeared mess before the first guest arrives. The fix is simpler than most people think. Match the blade to the texture. Soft cheese needs low drag. Firm cheese needs control. Hard cheese needs leverage. Spreadable cheese needs a blade that glides, not cuts.
Get that right and the whole board comes together without effort.
What Makes a Good Cheese Knife Set
Four jobs. That's all a good set needs to cover.
- Soft cheese knife: thin blade or voided openings to keep surface contact low and stop sticky cheese from dragging
- General cheese knife: the all-purpose blade for semi-hard and firm varieties like Cheddar, Gouda, Comté, and anything in between
- Blue cheese knife: slim and narrow, so crumbly paste moves cleanly off the blade instead of clumping
- Spreader: rounded edge, not sharp; built to glide through cream cheese, fresh chèvre, and soft spreadable varieties
Anything beyond those four is a bonus. A set that covers all of them handles the vast majority of what ends up on a real board.
The Best Cheese Knife Set for Most People
Cheese isn't going anywhere. The Agricultural Marketing Resource Center puts U.S. cheese production at 14.1 billion pounds in 2023. People are eating more of it, serving it more often, and paying more attention to how it's presented. A decent knife set stopped being optional a while ago.
For most people, the starting four looks like this: a knife for soft cheese, a Professional Cheese Knife, a Professional Blue Cheese Knife, and a Professional Spreader Knife. That lineup covers Brie, Cheddar, Gorgonzola, and chèvre. No redundancy, no gaps.
Other styles like pronged blades, cheese planes, cleavers are worth picking up once you know what you're missing. They're not where you start.
Types of Cheese Knives and What They Actually Do
Blade shapes aren't decorative. Every variation solves a real problem that a standard knife creates.
Professional Soft Cheese Knife
The holes in the blade aren't a gimmick. They cut surface contact, so Brie, Camembert, Taleggio, and soft goat cheese release cleanly instead of sticking and pulling. The offset handle keeps the cut controlled without collapsing the center. Small difference in the hand, big difference on the board.
Professional Cheese Knife
Call it the workhorse. Wide enough to handle a firm wedge, sturdy enough to push through semi-hard paste, and balanced for the downward press that Cheddar and Gruyère actually need. If a cheese isn't soft, blue, or spreadable. This is the knife.
Professional Spreader Knife
Cheese spreader knives work on a completely different principle than cutting blades. The rounded edge is made to glide across surface, not bite into it. Cream cheese, fresh chèvre, soft butter, rillettes. Anything you'd ruin with a sharp edge goes here.
Professional Blue Cheese Knife
Thin and narrow. That's the whole design philosophy. The blade slips through Gorgonzola, Roquefort, and Stilton with barely any contact, so crumbly paste stays where you put it instead of smearing across the board. Every other knife on the set struggles with blue cheese. This one doesn't.
Professional Tasting Cheese Knife
Breaking, lifting, serving. One tool, one motion. The fork tip and pointed end make it the right pick for aged hard cheeses where you want irregular, rustic pieces rather than clean slices. Some cheeses are better cracked than cut.
How to Match Knife to Texture
Let’s see how you can match knives to texture.
Soft Cheese
Thin blade, voided blade, or Wire Cutter. The Wire Cutter, a metal wire pulled through the cheese, is actually the cleanest option for a whole wheel of Brie or a fresh goat cheese log. No distortion, no drag.
Semi-Soft Cheese
Washed-rind and semi-soft varieties need a cut that keeps the rind from dragging across the paste. The Wire Cutter handles clean portions. A mini serving knife is useful for lifting bites. Guests can serve themselves without handling the cheese.
Firm and Semi-Hard Cheese
One technique change covers most mistakes here: press straight down, don't rock or drag. A rocking motion crumbles Manchego, Cheddar, and Comté before they reach the plate. Vertical pressure from the Professional Cheese Knife gives you clean, intact wedges.
Hard and Aged Cheese
Hard cheeses often look better broken than sliced. Cheesemonger Anne Saxelby says it plainly in Epicurious: "You don't have to worry about creating smooth, even slices." Use the Professional Cheese Knife on Parmigiano Reggiano, aged Gouda, and extra-mature Cheddar, leverage does the work, not the edge.
More on technique in Formaticum's cheese cutting guide.
Features Worth Paying Attention To
Here are the features you must look for.
Blade Material
Stainless steel handles the acidity in aged cheese without corroding, cleans fast, and holds up to daily use. Paired with solid walnut handles, it gives the kind of weight and balance that actually matters when you're pressing through a dense block.
Handle Design
Offset handles do two things: they give you leverage and keep your knuckles off the board. That second part sounds minor until you've bruised a knuckle on a cutting board mid-party. Look for a balanced grip that doesn't tire the hand after more than a few cuts.
Set Size
Three knives can cover the basics. Four or five handles everything confidently; soft, firm, blue, spreadable, aged. And once you've cut, wrap any leftovers correctly. Read what is cheese paper before reaching for plastic wrap. How you store it matters as much as how you cut it.
Storage and Care
Keep knives in their wooden box. It protects both the blade edges and the handles from the kind of casual damage that happens in a crowded drawer. Hand-wash, dry fully, and don't throw them in with other metal utensils.
Sets Worth Avoiding
Decorative-only sets look polished in the packaging and fail the moment you actually use them. A flimsy or dull blade won't hold up to anything firmer than Brie. Blade shape matters but so does the steel behind it.
Sets with no real variety, three or four nearly identical long, straight blades leave you with nothing useful when the cheese gets sticky or dense. A genuinely functional set needs to handle at least three distinct cutting jobs: slicing, spreading, and managing crumbly or high-moisture textures without making a mess.
How Many Knives Do You Actually Need
Most boards run fine on three to five. More variety on the board usually means more cutting jobs to cover.
Minimal setup: Professional Spreader Knife, Professional Blue Cheese Knife, Professional Cheese Knife. Add the Wire Cutter if Brie or Camembert is a regular on your boards.
Complete setup: The Mini 4 Knife Set or Professional 4 Knife Set. As Anne Saxelby notes in Epicurious, "A great general rule of thumb is two ounces of cheese per person." Bigger boards, more variety, more tools.
Recommendations by Use Case
For hosting: The Professional 4 Knife Set. It covers soft, firm, blue, and spreadable without requiring anything additional. One box, every texture handled.
For gifting: The Mini 4 Knife Set is one of the best unique gifts for cheese lovers, compact enough not to clutter a kitchen, useful enough to reach for every time. Firm, soft, blue, spreadable. All covered.
For small boards: Individual mini knives or the Mini 4 Knife Set. A full professional set on a two-cheese board is overkill.
Conclusion
More knives isn't the goal. The right knives are. Soft cheeses need thin or voided blades. Firm cheeses need controlled downward pressure. Blue cheeses need a narrow edge that won't compress the paste. Hard cheeses need breaking, not slicing.
Start with four. Add specialty tools when a specific cheese demands it. Let every piece keep its texture, flavor, and shape. That's what the right set actually does.
Frequently Asked Questions
Let’s address some questions around the best cheese knife sets.
What is the best set of cheese knives?
A three- to five-piece set that covers soft, firm, blue, and spreadable cheeses handles the vast majority of boards. The Mini 4 Knife Set and Professional 4 Knife Set both hit that range without overlapping.
Why do cheese knives have holes?
Less surface area means less sticking. Soft cheeses like Brie and Camembert cling to a solid blade and drag. The holes break that contact so the cheese releases cleanly. It's not aesthetic; it's functional.
Can I use a regular kitchen knife for cheese?
Technically, yes. Practically, it sticks to soft cheese, crushes delicate paste, and crumbles anything aged. The right knife doesn't just look better, the cheese actually tastes better because the cut doesn't damage it.
Should cheese knives be sharpened?
Some, yes. But most specialty tools like spreaders, wire cutters, blue cheese knives aren't edge-dependent. They work because of blade geometry, not razor sharpness. Sharpening a spreader changes nothing. Keeping it clean and dry does.

Formaticum News
Our home to share our cheese chronicles and more.
Categories
Recent Posts
Wire Cheese Cutter Vs Traditional Knife: Choosing the Right Tool for Your Cheese
5 Best Knives for Cutting Different Types of Cheese
10 Cheese Storage Tips to Keep It Fresh Longer
Upcoming Events
Connect with Us
Join the Newsletter
Sign up to receive special offers, new product releases, updates from the cheese shop, and more.